How to create interactive lessons for students with Nearpod
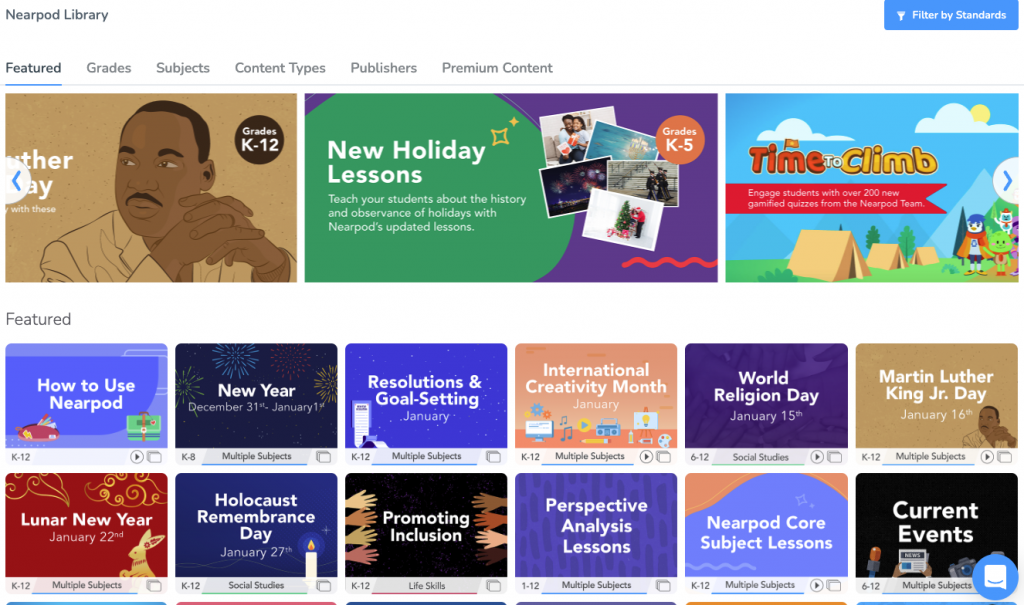
With over 22,000+ resources at your fingertips in the Nearpod Library, it is easy to find high-quality lessons, activities, and videos to meet your students’ needs. While these resources are invaluable, we recognize that educators like you often craft materials tailored to the unique needs of your classrooms. Our streamlined Lesson Builder simplifies and accelerates the process of transforming your innovative ideas and existing content into engaging interactive lessons to help you see every student. Keep reading to learn how to create impactful lessons on Nearpod.
An introduction to Nearpod lessons
Foster a love of learning in every student with Nearpod. Teachers can sign up for free below to access and create interactive lessons. Administrators can schedule a call with an expert to unlock the full power of Nearpod for schools and districts.
What you need to know before creating a Nearpod lesson
As you begin creating lessons for students, it is important to understand Nearpod’s features. Interactive slides are broken down into three major categories:
Creation media
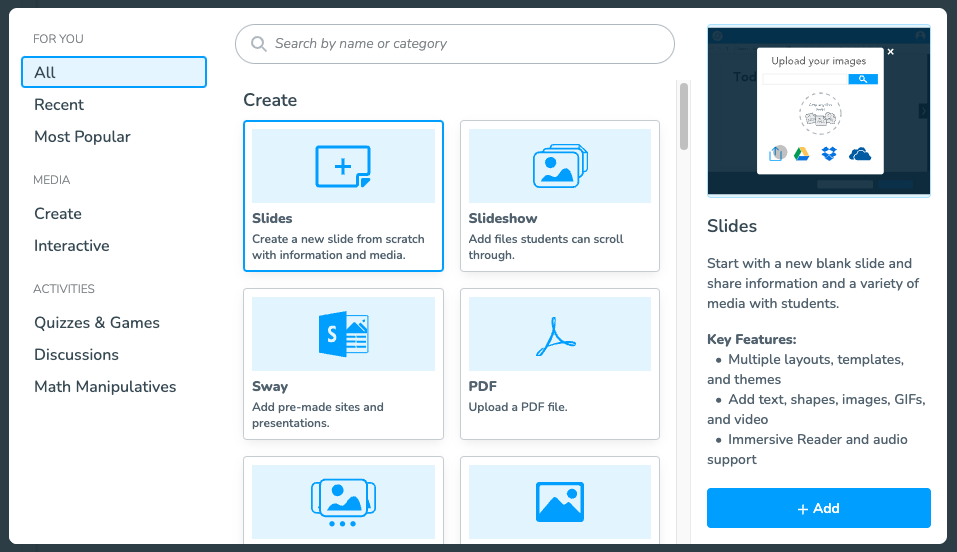
Slides, Sways, and Slideshows hold the essential content to guide your learners through the interactive lesson. The most common content media educators use is slides.
Dynamic media
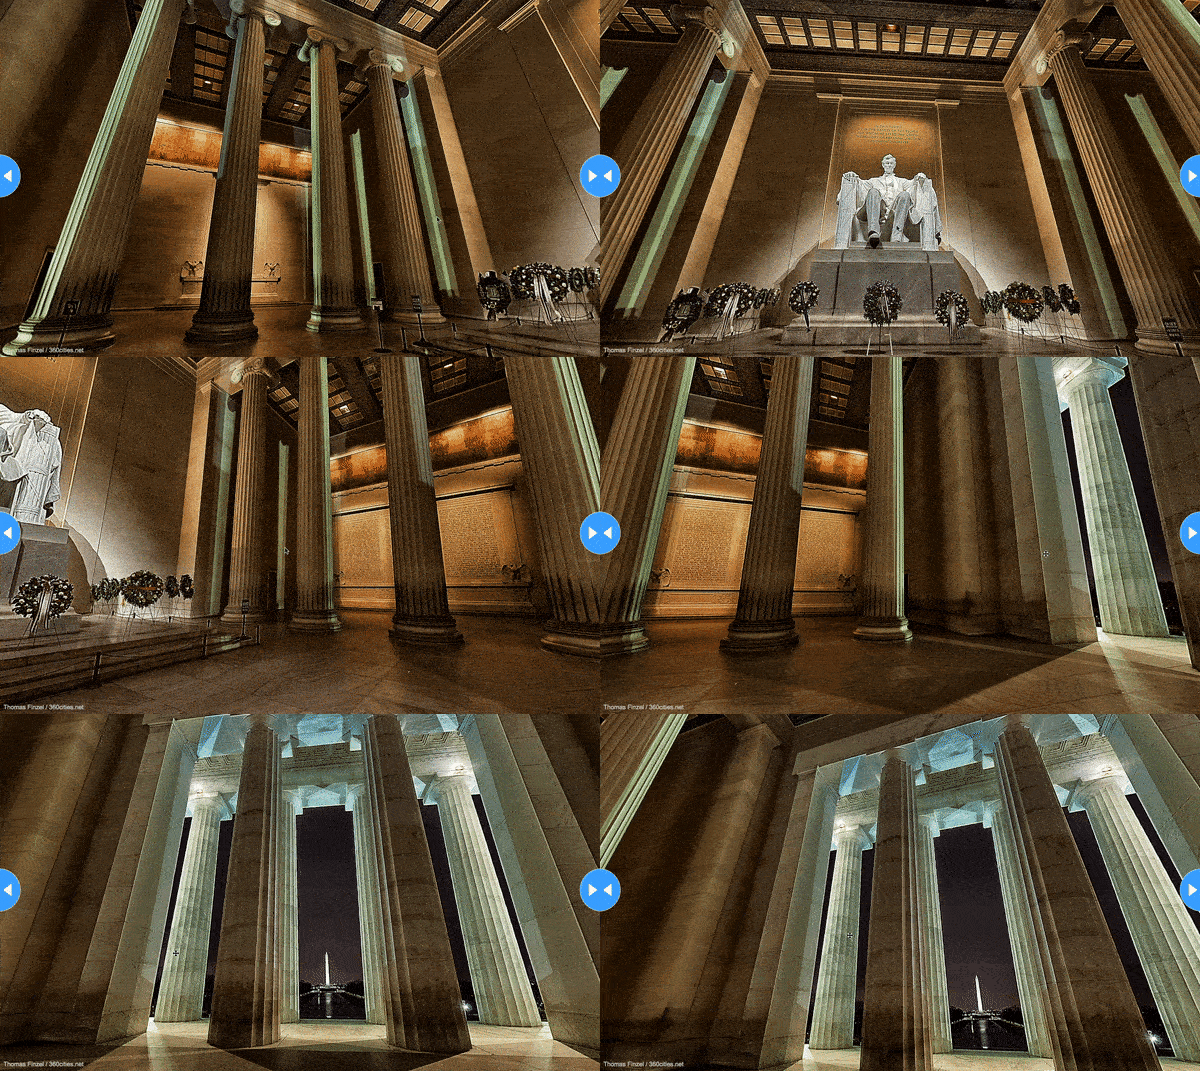
Incorporate 3D objects, Simulations, and VR Field Trips to breathe life into your content, fostering a deeper understanding.
Interactive activities
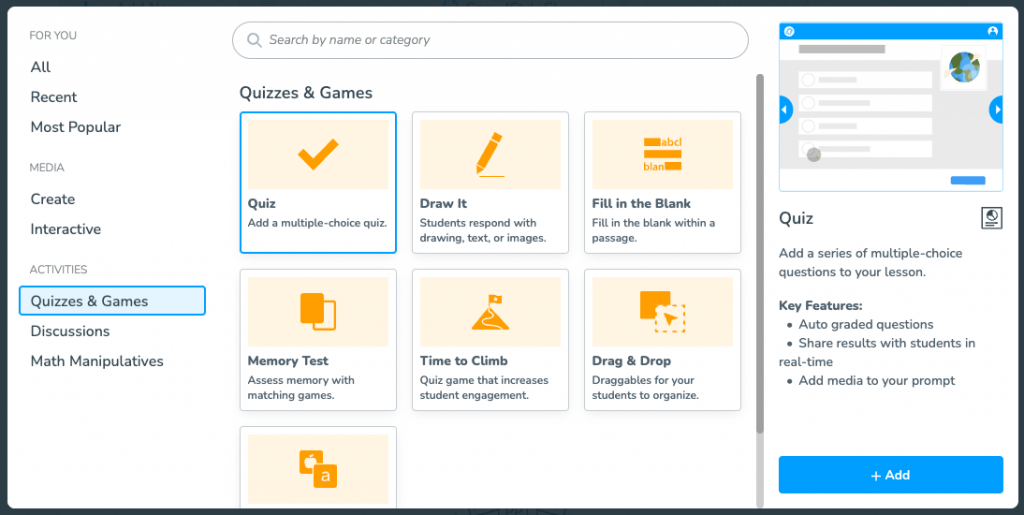
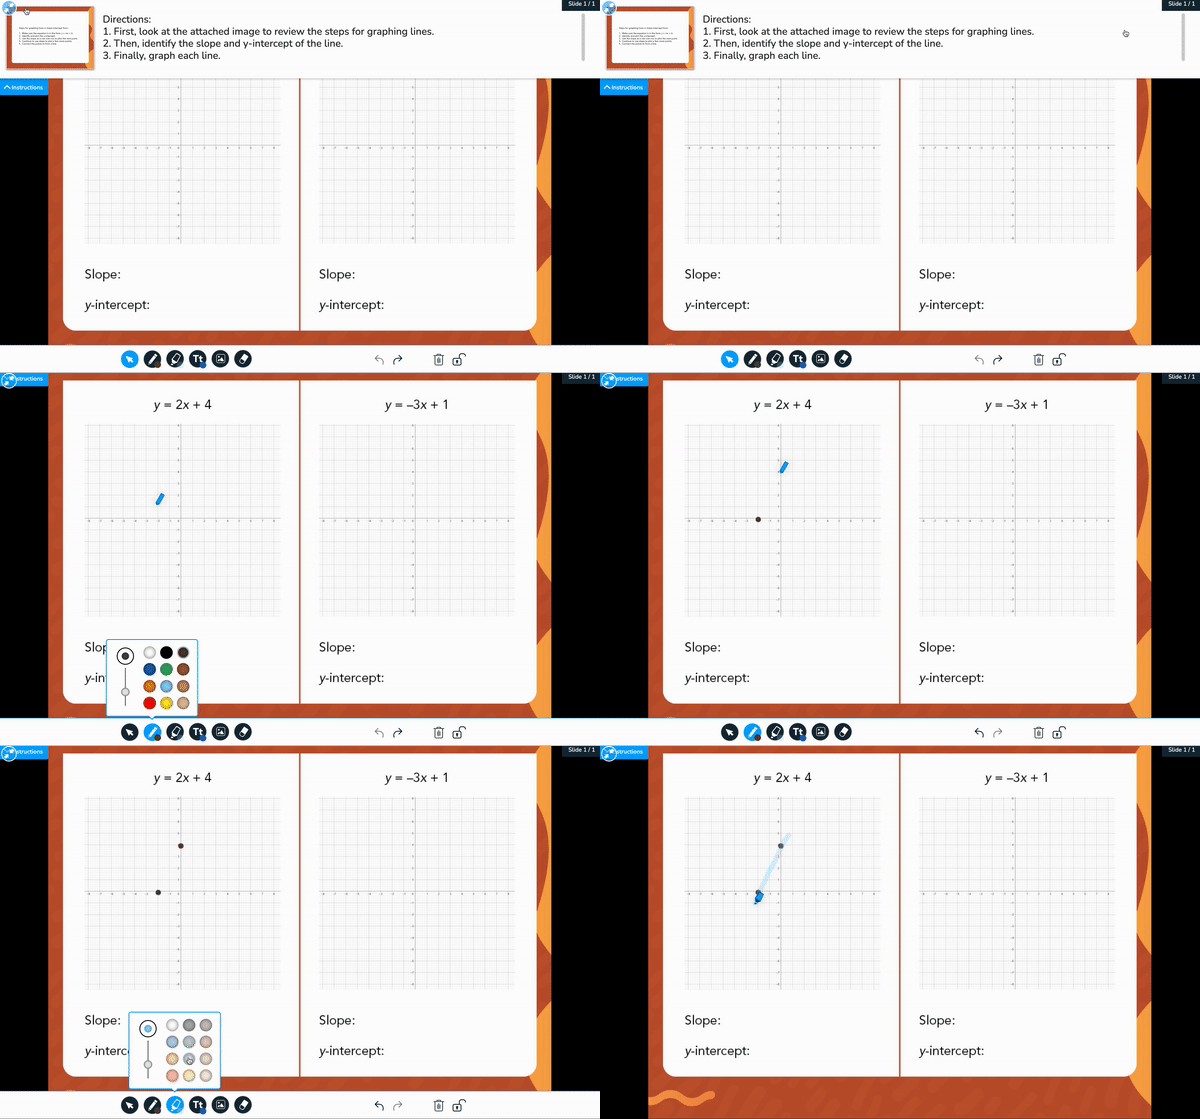
Engage your students with captivating activities like Time to Climb, Draw It, Open-Ended Questions, and Collaborate Boards, which capture the pivotal moments of learning.
How to create a lesson on Nearpod
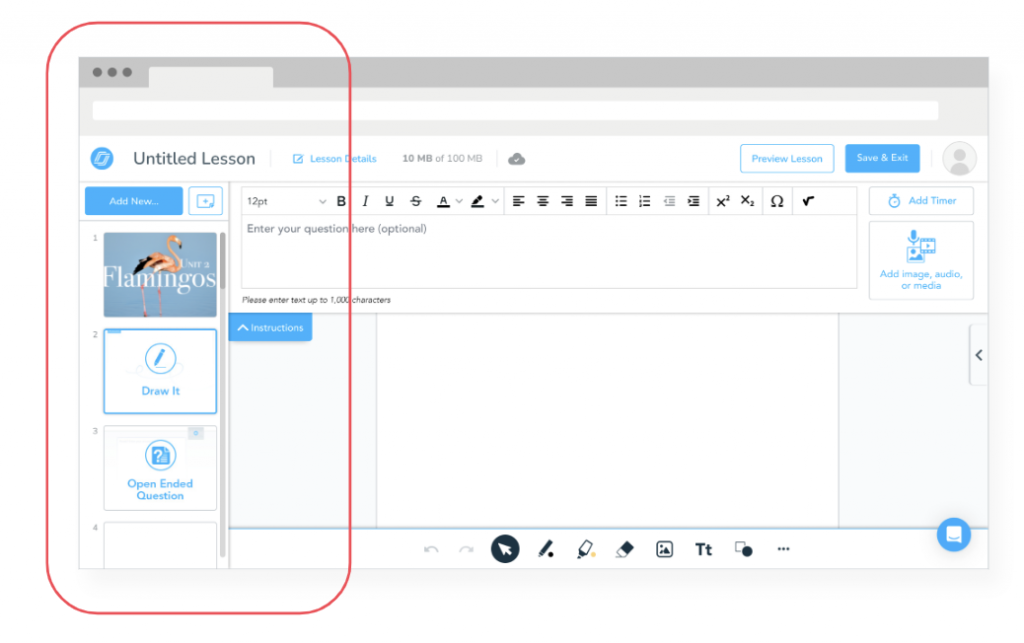
Our Lesson Builder features a user-friendly design that is familiar to those who have experience with tools like PowerPoint or Google Slides.
Step 1: Launch the Lesson Builder
Click on “Create” and select “Lesson” to launch the Lesson Builder.
Step 2: Choose your slides
Select “Slides” from the Activity Selector. The Slide Editor offers a variety of pre-designed templates and layout features, enabling you to curate content slides for your lessons. Unleash your creative style in text boxes, leveraging rich-text capabilities and the Nearpod Equation Editor. Layer images, GIFs, and even your own audio directly onto slides. Create your content even faster using the new quick add slide button!
Step 3: Incorporate interactive media and activities
Click “Add New” to continue adding Dynamic Media and Activities, to finish building your interactive lesson.
Include activities from the Nearpod lesson library to customize your lesson using the Activity Bank. With thousands of pre-made Time to Climb quizzes and Matching Pairs, Drag and Drop, and Draw It activities, teachers can easily customize any lesson in Nearpod with standards-aligned activities.
Step 4: Input lesson details to stay organized
Click on “Lesson Details” to give your lesson a title, provide a description for the lesson, and tag the lesson with relevant grade levels and subjects. This metadata enhances searchability, making it easier to find and share your lessons.
Step 5: Launch and observe the magic
Launch your lesson in either Live Participation or Student-Paced modes and see the impact of Nearpod in action!
Tips for creating your own Nearpod lesson
As you design interactive lessons for students, here are some tips to get you started!
Tip #1: Use the lesson library for inspiration
It can be difficult to know where to start when building lessons for your students. Nearpod’s curriculum team comprises former educators who design lessons around the latest research into active learning strategies, such as the 5 E’s Model and Guided Inquiry. Filter the Nearpod Library by grade level, subject, or state standards to discover new ways to approach your content. You can even copy and paste library resource content directly into your lessons!
Tip #2: Use what you already have
We know you already have amazing resources in other formats. Use the Upload Slides feature to quickly upload your PowerPoints and Google Slides into Nearpod, transforming them from static presentations to lessons for your students. You can even use worksheets for Draw It or Drag and Drop activities. Learn more about how to convert your existing presentations into a Nearpod lesson.
Tip #3: Enhance your Google Slides with the Nearpod Add-On
If you prefer to “Nearpodize” your existing Google Slides while working within the familiar Slides tool set, Gold, Platinum, and School or District users can integrate Nearpod activities and dynamic media content directly with the Nearpod add-on! With the Nearpod Slides add-on, your embedded hyperlinks stay active, and Microsoft Immersive Reader will be able to read all the text on your Slides to support all learners. Learn more about integrating your Nearpod lessons in Google Slides.
Already have access to a free Nearpod account? Click below to upgrade to Gold!
Tip #4: Organize ALL of your digital resources in one space
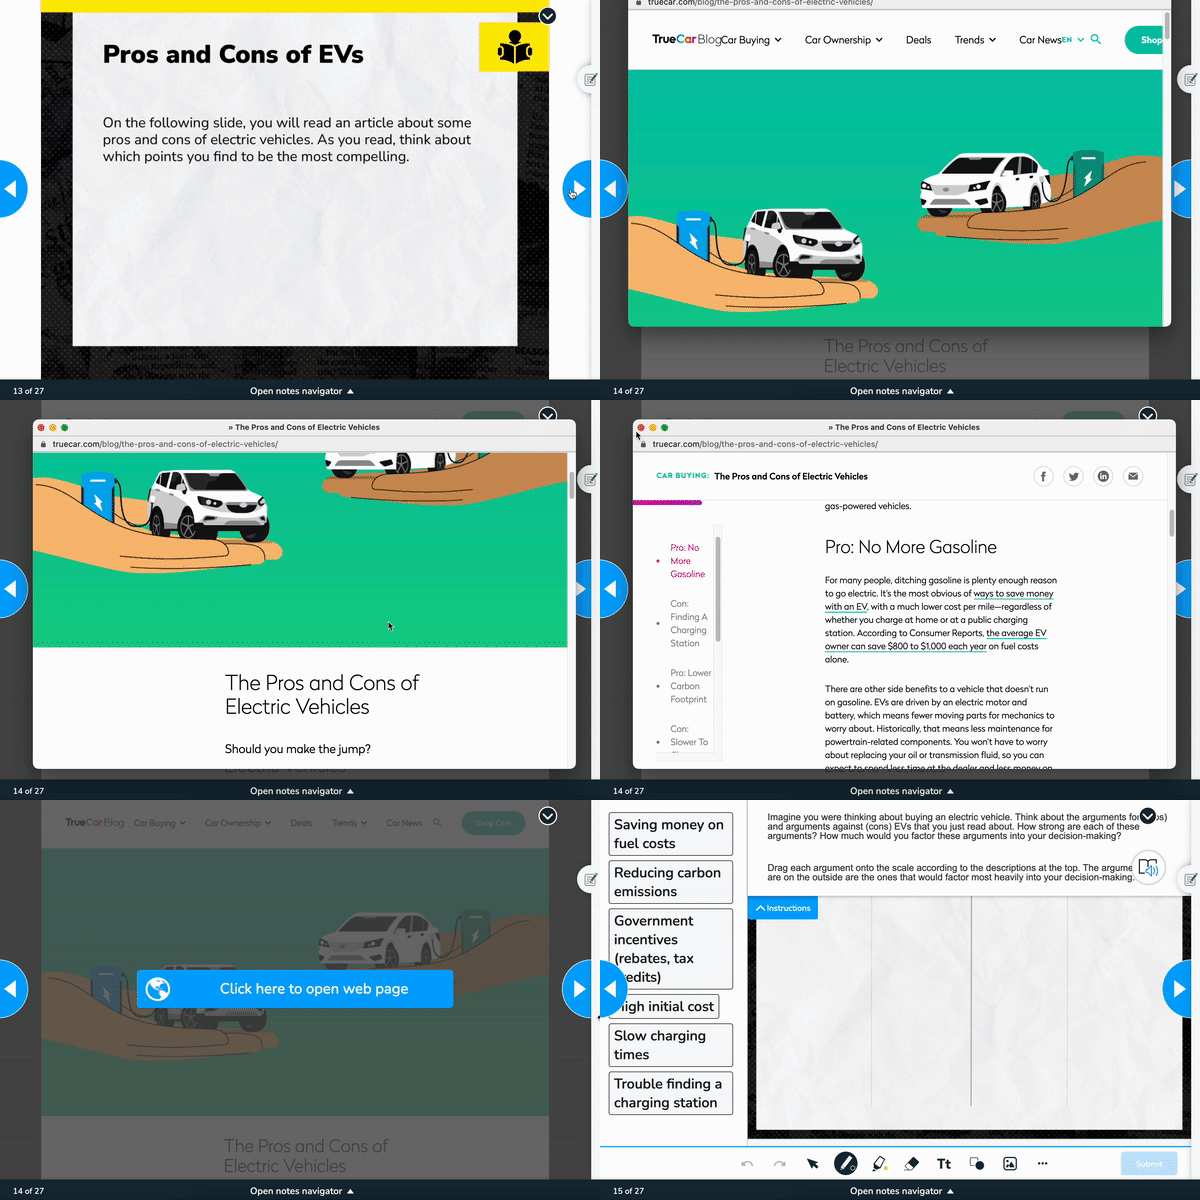
As we incorporate technology into our classrooms, it is easy to lose students to an array of open tabs. Direct students to specific websites, district curricular resources, or collaborative learning experiences with Google or Microsoft tools quickly and easily, using Nearpod’s Web Content feature. Using Web Content, all of those links can be easily integrated directly into your interactive lessons, ensuring you and your students are always on the same page. Learn more about enhancing your lessons with Web Content.
Tip #5: Combine dynamic media and activities
When creating lessons, it is important to remember all of the magic you have available to you in Nearpod. VR Field Trips, PhET Simulations, and 3D objects help the learning come to life. But did you know that you can easily pair that dynamic media content with one of Nearpod’s activities to truly make student thinking visible?
- Combine several VR Field Trips for a compare and contrast interactive classroom activity. Students can explore the various locations and then use a Collaborate Board to discuss or even debate their findings with their peers.
- Add a blank Draw It after a Simulation for students to upload their discoveries. First, they experience the simulation and then take a screenshot of their work. They can upload their image and then annotate right on top of it to explain what they have uncovered.
- Create a Drag & Drop activity to label the parts of a cell using a screenshot of a 3D object. Students can explore the cell in their browser and then demonstrate their understanding by correctly labeling the various parts they have seen.
Start creating lessons on Nearpod
Whether you are using pre-made lessons from the Nearpod Library, enhancing your own materials, or even working directly in Google Slides, Nearpod makes it easy to create lessons for your students’ learning needs.
Foster a love of learning in every student with Nearpod. Teachers can sign up for free below to access and create interactive lessons. Administrators can schedule a call with an expert to unlock the full power of Nearpod for schools and districts.

Nearpod’s award-winning platform is used by thousands of schools around the globe, transforming classroom engagement.
